
2階にいるとチャイムの音が聴こえにくいので、宅配便が来た事に気が付かないことがあります。玄関に人が入ってきたらアレクサにお知らせしてもらおう、という試みです。
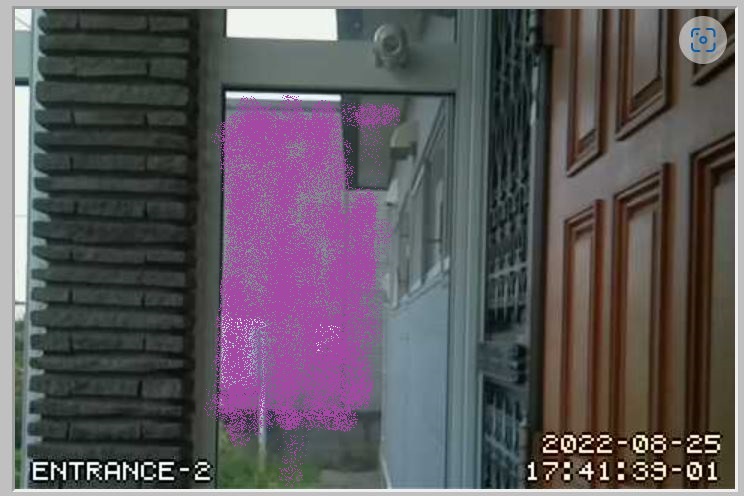
以前から玄関フード内にカメラをセットしたラズベリーパイZEROを設置していて、インターホンの横に貼り付けておりました。カメラ付きインターホンのように使えればよいかなと思ったのですが、視野が狭く殆ど使い物になっていません。敢えて言うと冬に外に出なくても雪庇の状態を確認できるという程度です。
今回このカメラを人感センサーとして使おうと思います。
motionは動きを検知したら動画を記録するのですが、そのタイミングをトリガーにしてプログラムを動かせないかを調べたところ、motionにオプションが用意されていました。
on_event_start
https://motion-project.github.io/motion_config.html#on_event_start
動きを検知したらホームディレクトリにあるシェルスクリプトを起動するように/etc/motion/motion.confの最後に以下の一文を追加します。
on_event_start /home/pi/detect.sh
detect.shの内容は以下のようになっています。
#!/usr/bin/bash
cd /home/pi
python ./camera_detect.py
pythonプログラムcamera_detect.pyは、起動されると現在時間をファイルに記録し、ダミーセンサーを検知状態にします。アレクサで定型アクションを作成し、ダミーセンサーの検知を実行条件にしてアレクサにお知らせしてもらうように設定します。
プログラムは以下のようになっております。
camera_detect.py
from datetime import datetime
import os
import subprocess

# 連続回避
SLEEP_TIME = 300
LATEST_FILE = "./latest.txt"
# LOGファイル名
LOGFILE = '/var/www/html/sensor_log.txt'
MAX_LINE = 100

# 連続回避
def isStart(now):
  if os.path.exists(LATEST_FILE):
    f_time = os.path.getmtime(LATEST_FILE)
    expiring_time = datetime.fromtimestamp(f_time + SLEEP_TIME)
    if now > expiring_time:
      f = open(LATEST_FILE, 'w')
      f.close()
      return 1
    else:
      return 0
  else:
    f = open(LATEST_FILE, 'w')
    f.close()
    return 1

# テキスト保存
def saveText(now):
  list = []
  if os.path.exists(LOGFILE):
    f = open( LOGFILE, 'r' )
    for line in f.readlines():
      list.append(line)
    else:
      f.close()
  start = 0
  num = len(list)
  if num >= MAX_LINE:
    start = num - MAX_LINE + 1
  f = open( LOGFILE, 'w' )
  for i in range(start, num):
    f.write( list[i] )
  f.write( now.strftime('%Y/%m/%d %H:%M:%S\n') )
  f.close()

# main関数
if __name__ == '__main__':
  now = datetime.today()
  if isStart(now):
    saveText(now)
    subprocess.run('./send24.sh')
プログラムの説明
最初のnow = datetime.today()では現在日時を取得しています。この時間をイベント発生日時とします。
次のisStart()関数では以降の処理をすべきかどうか判定します。前回の検出から5分(300秒:SLEEP_TIME)経たないイベントは処理しないことにしています。空のファイルlatest.txtを作成し、そのファイルの更新時間と現在日時を比較して判定します。
処理する場合はsaveText()関数で現在日時をファイルsensor_log.txtに書き込みます。古いものは削除し、直近100回(MAX_LINE)のイベント日時を書き込みます。出力ディレクトリを/var/www/html/にしたのはこれをホームページ上で表示させるためです。
次にシェルスクリプトsend24.shを起動します。
send24.sh
#!/usr/bin/bash
python ./alexa_trigger_func.py 24
pythonプログラムalexa_trigger_func.pyを実行し、ダミーセンサーNo.24を検出状態にします。
当初、シェルスクリプトを介さずに直接subprocess.run(‘python ./alexa_trigger_func.py 24’)としていました。Windows環境では上手く動作したのですが、ラズベリーパイではエラーになってしまったので、シェルスクリプトを介して起動することにしました。
そもそも、alexa_trigger_func.pyはメインのプログラムにimportし、関数コールで実行するつもりでした。しかし、それをするとラズベリーパイZEROではちょっと困ったことになったのです。当初のalexa_trigger_funcをimportしたプログラムでは現在日時が実際に発生した日時よりも7~8秒かそれ以上遅れて記録されていました。アレクサへの通知はもっと遅れて10数秒かかっています。プログラムの1行目に日時を取得しそれを書き込んでいるのに、です。ライブラリをimportすると、プログラム実行前にimportしたライブラリとそれに関連するライブラリすべてを読み込んでしまうので、最初のステップを実行する前に数秒かかっているようでした。これをmotionの動作検知イベントで行うと録画処理と並行して実行するのでさらに数秒遅くなるようなのです。ラズベリーパイZEROはCPUの処理能力が低く、それに動画処理をさせているための問題で、通常の環境では問題にならないかもしれません。
alexa_trigger_funcのimportを止めたことにより、発生日時を取得し、ファイルに書き込む処理はそれほど時間がかからずにできるようになりました。しかし、アレクサによる通知は依然として発生から10数秒かかるままです。
これを幾分解消しようと、動画のフレームレートを15から7に落としてみました。動画処理にかかる負担を減らすことでアレクサへの通知処理を速くしようという狙いです。しかしながら結果は改善したように見えませんでした。これ以上は現状のハードウエアでは諦めるしかないかもしれません。ZERO2ならもっと速くなると推測します。いつか試してみたいものです。
alexa_trigger_func.pyはメイン起動するプログラムを関数化したものですが、メイン起動も関数コールもできるように若干の改良を行いました。
alexa_trigger_func.py
import sys
import os
import json
import datetime
from trace import Trace
import requests

client_ID = ''
client_secret = ''
refresh_token=''
token_file = './token.txt'

def alexa_trigger(no):
  sensor_name = 'dummy_sensor_' + format(no, '0>3')
  # アクセストークンが有効かどうかチェックする
  access_token = ''
  access_token_valid = False
  today = datetime.datetime.today()
  if os.path.exists(token_file):
    #ファイル有、データ読み込み
    f = open(token_file)
    data = f.read()
    f.close()
    jdata = json.loads(data)
    expires = jdata['expires_in']
    f_time = os.path.getmtime(token_file)
    file_time = datetime.datetime.fromtimestamp(f_time)
    expiring_date = datetime.datetime.fromtimestamp(f_time + expires)
    if today < expiring_date:
      # アクセストークン有効、取得
      access_token_valid = True
      access_token = jdata['access_token']

  # アクセストークンが無効の場合はoa2サーバーから取得
  if not access_token_valid:
    header_str = {
      'Content-Type': 'application/x-www-form-urlencoded;Accept-Charset=UTF-8'
    }
    body_str = {
      "grant_type": "refresh_token",
      "refresh_token": refresh_token,
      "client_id": client_ID,
      "client_secret": client_secret
    }
    response = requests.post('https://api.amazon.com/auth/o2/token', data = body_str, headers = header_str)
    if response.status_code != 200 :
      print(response.status_code)
      exit()
    jdata = json.loads(response.text)
    access_token = jdata['access_token']
    if len(access_token) > 0:
      access_token_valid = True
      # ファイルに書き込み
      f = open(token_file, 'w')
      f.write(response.text)
      f.close()

  if not access_token_valid:
    print('can not get access_token')
    exit()

  # イベントゲートウェイにイベントを送信する
  message_id = sensor_name + '_' + str(today)
  timeOfSample = today.strftime('%Y-%m-%dT%H:%M:%S.00Z')
  header_str = {
      'Authorization': 'Bearer ' + access_token,
      'Content-Type': 'application/json'
  }
  json_str = {
    "event":{
      "header":{
        "namespace":"Alexa",
        "name":"ChangeReport",
        "messageId":message_id,
        "payloadVersion":"3"
      },
      "endpoint":{
        "scope":{
          "type":"BearerToken",
          "token":access_token
        },
        "endpointId":sensor_name
      },
      "payload":{
        "change":{
          "cause":{
            "type":"PHYSICAL_INTERACTION"
          },
          "properties":[
            {
              "namespace":"Alexa.MotionSensor",
              "name":"detectionState",
              "value":"DETECTED",
              "timeOfSample":timeOfSample,
              "uncertaintyInMilliseconds":0
            }
          ]
        }
      }
    },
    "context":{
      "properties": [
        {
          "namespace": "Alexa.EndpointHealth",
          "name": "connectivity",
          "value": {
            "value": "OK"
          },
          "timeOfSample": timeOfSample,
          "uncertaintyInMilliseconds": 0
        }
      ]
    }
  }

  response = requests.post('https://api.fe.amazonalexa.com/v3/events', json = json_str, headers = header_str)
  if response.status_code == 202:
    print('success')
  else:
    print(response)

if __name__ == '__main__':
  alexa_trigger(sys.argv[1])
最後の2行を追加しただけです。
内容の詳細については仕組みを説明した「スイッチでAlexa定型アクションを起動~導入編~(https://km2-system.com/2022/06/27/alexa_switch_1/)」、最初のバージョンについて記載した「スイッチでAlexa定型アクションを起動~スキルテスト編~(https://km2-system.com/2022/06/29/alexa_switch_4/)」、関数化させた「明日の天気によってAlexa定型アクションを起動する(https://km2-system.com/2022/08/22/alexa_switch_8/)」を参照してください。
以下は記録した日時を表示するHTMLファイルです。
sensorlog.html
<!DOCTYPE html>
<html lang='ja'>
<head>
  <meta charset='UTF-8'>
  <meta name='viewport' content='width=device-width, initial-scale=1'>
  <meta http-equiv="Cache-Control" content="no-cache">
  <title>Motion sensor log</title>
  <link rel="stylesheet" href="css/style.css">
  <script type='text/javascript'>
    var req = new XMLHttpRequest();
    req.open('get', 'sensor_log.txt', true);
    req.send(null);
    var result = '';
    req.onload = function() {
      tmp = req.responseText.split('\n');
      for( var i = tmp.length - 1; i >= 0; i-- ) {
        if( tmp[i] == '' ) continue;
        result += tmp[i];
        result += '\n';
      }
      document.getElementById('text').value = result;
    }
  </script>
</head>

<body>
  <p>人感センサー</p>
  <textarea class='list-motion-sensor' id='text' title='sensorlog' cols='25' rows='20' readonly></textarea>
</body>
</html>
/var/www/html/css/style.cssには以下の5行を追加します。ファイルやフォルダがない場合は作ります。
.list-motion-sensor{
  resize: none;
  font-size:14pt;
  background: #C0C0C0;
}
sensorlog.htmlは/var/www/html/に配置します。以下が表示イメージになります。

使った感想としては、今のところ『とても良い』です。
カメラとして視野が狭く、明るさに鈍感で夜若干明かるくなっても反応しない、というのが逆にいいです。
夜、ライトをつけた車が通っても、玄関横のトイレの明かりがついても反応しないのです。
玄関フードに入ると人感センサー付きの電池式ライトが光るので反応します。
視野が狭く、郵便や新聞を配達してくれた際に手が映るか映らないか際どい感じなので反応しないときがありますが、目的としては問題ないです。
むしろもうちょっとだけ上に設置しても良いかもしれません。